TL;DR
The sudo vulnerability that was recently uncovered is critical due to the ubiquity of Linux machines all around us. In this first article, we discuss how to find the vulnerability using a command line argument fuzzing tool, AFL.
The video
Introduction
A critical sudo vulnerability was recently published (CVE-2021-3156), and we think it's a great foundation to build a video series upon! There will be plenty of episodes, so that we have ample time to get into the really nitty-gritty technical details. In the series, we will lay out the steps to find, analyze, and exploit the sudo vulnerability.
sudo is the utility that any regular user in the sudo group can use to execute commands as root. If a user is not in the sudo group, then they cannot execute commands with root privileges. This vulnerability actually enables an unprivileged user to exploit the sudo program and elevate their privileges and act as root throughout the system. This is why it's a critical vulnerability!
sudo vulnerability. We'll find the bug, analyze how it works, and see how it can be exploited.For this first article of the series, we'll focus on tracing the steps to establish how the bug was uncovered, as if we didn't know it existed. We'll try to forget everything that we've seen to date about the vulnerability, and proceed forward as if we didn't know, with a small caveat: we'll be blind to the method, but we know that the sudo vulnerability exists, and that our target is sudo (and the right version!). We also maintain access to public information to keep it as a cheat sheet. Wherever possible, we will avoid using it and find the steps by ourselves. This is the method with which we learn the best; therefore, we will use it to discover, analyze, and exploit the sudo vulnerability.
We've set up a GitHub repository with our code for this series; the repository contains different folders, which correspond to material covered in each episode of the series.
System Setup and Bug Reproduction
As you might imagine, the very first thing we need is a machine that we can do our work on. We started out with an Ubuntu virtual machine, but we were (pleasantly) surprised to find out that the patch had already been applied, so the vulnerability was already addressed.
sudo. No dice.We decided to use a Docker container instead. The base Docker file is pretty simple; it includes the following commands:
- Download Ubuntu 20.04,
- Install important packages (
gcc,make,wget,curl...), - Download and install the vulnerable version of
sudo, and - Create an unprivileged user called, well,
userthat we will use throughout this series to see how we can elevate thisuser's privileges.
We also set up a makefile to build the Docker container with the vulnerable sudo version so that we can carry out our study of the bug.
sudo.Using make all or make build and make run will execute the docker commands required to build the container that has the vulnerable version of sudo running. At the time of making the video and writing this article, the sudo website seems to be down intermittently, so for your convenience's sake we've included the files in the GitHub repository.
Now, it's time to get the container running. You can make sure that it is by typing
sudo docker ps -linto the terminal. Get a shell for the user in the container by typing
sudo make attachin the terminal. You can alternately get this shell as a root user by instead typing
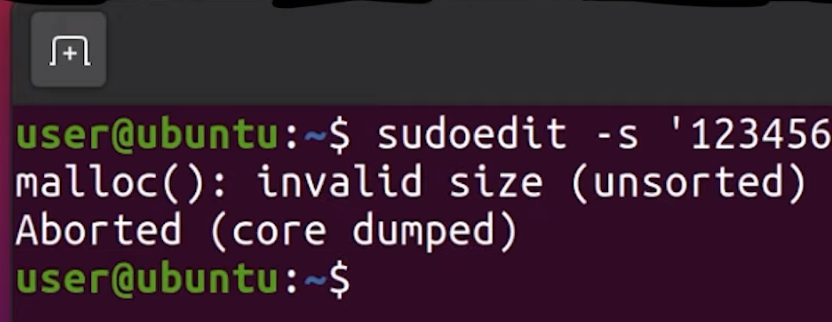
sudo make rootLet's check the bug! Using the container shell, type
sudoedit -s 'AAAAAAAAAAA\'
Why sudo?
Great! Now, it's time to forget everything that we just discussed. Imagine that you have a fresh Linux install, and you want to conduct security research. This means that we need to pick a target, something to start with, so that our research has a direction. There are many great options, and Qualys researchers, the very same ones who found this bug, have a couple of words to say about how they look for targets.
- They have a history of auditing open security software (i.e. open-source projects), in particular popular projects.
- They picked a ubiquitous tool -
sudo- which is present on almost every Linux machine out there. sudo's source code is actually quite long. There is a sort of linear relationship between code length and attack surface size and propensity for security-relevant programming mistakes that fly under the radar, as well as frequency of code updating and the same propensity for these programming mistakes.
Even if you're a great developer, the more code you write, the more likely you are to introduce a vulnerability. It's a law of computer science. To summarize, sudo is a large piece of software, but that makes it an excellent target for some local user privilege escalation vulnerabilities.

It's a pretty "simple" crash, but how is something like this found? There are many ways of exploring an attack surface; one of these is called "fuzzing", and it's exactly the one that we're going to be using today.
What the Fuzz?
A while ago, we heard about Hanno Böck's Fuzzing Project. The project's landing page has a couple of interesting points, reproduced in the quote below:
A modern Linux or BSD system ships a large number of basic tools that do some kind of file displaying and parsing. [...] [W]e have powerful tools these days that allow us to find and analyze these bugs, notably the fuzzing tool american fuzzy lop and the Address Sanitizer feature ofgccandclang.
This project thus aims to educate Linux users and teach them how to use fuzzing tools to improve overall system security. This begs the question: if tools like this one exist and they can be used to check out every input for a program or function, how had nobody used it yet to check sudo, which has such an apparently simple input to cause the bug?
We decided to investigate using the American Fuzzy Lop (AFL), or afl. We've had the chance to use afl before, but we'd still describe our user level with this piece of software as "novice". We also don't know anything about fuzzing besides afl, and the odd fuzzing Python script we wrote at some point.
afl for fuzzing. Their documentation is available on GitHub. We've included the afl build in the Docker makefile, so you don't have to do anything if you decide to use our makefile.The official documentation for AFL is actually quite good, and you can find the GitHub page here. The installation just involves cloning the repository, building with make and installing the right binaries with make install. If you've looked at the Docker file, you might've noticed that we already put this in there, so that when you build the first episode container, afl will get installed automatically.
Instrumenting sudo with AFL
Compiling with afl-gcc
If you have a gander at the makefile for Docker, the containers are launched in the current working directory, mounted to pwd inside the container. That way, whatever you do with the files in your current directory outside of Docker will be reflected inside of the container.
To instrument sudo, we can now download the sudo utility into this folder and open the code in an IDE of our choosing. Now, the source code will be available both inside and outside of the container. To build sudo and compile it, all you have to do is type the following two commands in a terminal, in the correct directory:
./configure
make
With this step completed, let's have a quick look at the quickstart.txt file available on the AFL's GitHub to find out about the various ways that we can instrument a target. For the record, we're using the original AFL in this part of the series, though we'll switch to AFL++ later (you'll see why soon).
Reading the quickstart guide tells us that AFL is suggesting that we modify the build steps we just followed for sudo. To do so, we run ./configure again, but we set the environment variable CC which overwrites which C compiler is used to build sudo. We punch this into our terminal:
CC=afl-gcc ./configure --disable-sharedto force the compilation process to use the afl-gcc C compiler instead of the normal one.
CC environment variable to use the afl-gcc compiler.Why this specific compiler? That's because it will modify sudo so that it can get fuzzed with afl. We suggest you also run make clean in your terminal to clean up object files and executables. Then, we can trigger a new build with make. Here's a hint: if you see a lot of afl in the compile log as it quickly scrolls before your eyes, then you know it's working.
The quickstart also mentions that if the program reads from stdin (standard input, that is), then you should also run afl-fuzz like so:
./afl-fuzz -i testcase_dir -o findings_dir -- /path/to/tested/program [...program's cmdline...]If instead the program takes input from a file, the quickstart recommends putting @@ in the program's command line, and afl will place an auto-generated file name in there for you.
From Command Line Arguments to Fuzzing
Unfortunately, that's not exactly what we want. AFL was designed to fuzz programs that read from the standard input or read a file, but that's not how sudo works. sudo instead requires arguments, which are input at the command line when invoking sudo. We need to change how AFL works with the program it fuzzes so that it can work with sudo.
A bit of cursory googling (using afl fuzz argv as our search terms), and we found what we were looking for... right in the AFL GitHub, hidden away in the experimental folder: the argv-fuzz-inl.h header file. This file's readme includes the following lines:
This file shows a simple way to fuzz command-line parameters with stock afl-fuzz. To use, add:

#include "/path/to/argv-fuzz-inl.h"

...to the file containing main(), ideally placing it after all the standard includes. Next, put AFL_INIT_ARGV(); near the very beginning of main().argv-fuzz-inl.h header file readme.... and that's exactly what we did. We copied the argv-fuzz-inl.h header file into the sudo source folder, then hunted down the main() function, which we found in the sudo.c file. We can thus add the include "/path/to/argv-fuzz-inl.h" line right at the top of the file, and AFL_INIT_ARGV(); in the first line of the main() function.
So, what does this specific header file do? AFL_INIT_ARGV(); is basically a macro that overwrites the argv[] pointer with afl_init_argv(&argc);, where argv[] is the array of strings passed into main() that contains the arguments. So what afl_init_argv(&argc); does is change where argv points to. AFL_INIT_ARGV(); then reads the data from stdin.
Let's look into the details of afl_init_argv(&argc); for a second.
The function starts by reading from the program standard input, stdin. *ptr is a pointer into the buffer that we read the stdin data into. The while loop right after runs as long as the byte we are pointing to is not zero. It has a counter rc that is used to remember the pointer position in the ret array. This while loop then contains two other, nested while loops that address what happens if *ptr reaches a whitespace character (spaces, newlines, tabs...):
- If
*ptrpoints to a whitespace character,*ptris set to the null byte\0, andptris incremented forward. - If
*ptrpoints to a character (rather, not a whitespace character),ptris incremented forward.
After that, the rc counter is incremented.
To summarize: we remember the first pointer at the start, noted in the ret[rc] array; we start at location 1. We then increment the pointer ptr forward to read more bytes. Once it encounters a null byte (\0) or a space, it breaks out, moves forward, does it again, and when it finds a second null byte, it goes to the outer loop again, and it can write the new location into the next ret[rc] array element.
In essence, the function expects an input with a lot of data separated by null bytes, and it creates an array of pointers, pointing to those strings. It basically creates a fake argv[] structure from input we read, and it returns the pointer to that structure.
So now, any code in the main() function that comes after the AFL_INIT_ARGV(); function call will use the "fake" argv[] structure. That way, afl can fuzz sudo. Bingo!
Time to compile and test it. Using
CC=afl-gcc ./configure --disable-shared
make clean && make
we compile and build our sudo. We also need to create test case input and output folders,
mkdir /tmp/in
mkdir /tmp/out
as well as a test input. We chose
echo -en "-l\x00" > /tmp/in/1Time to run the case!
afl-fuzz -i /tmp/in -o /tmp/out ./src/sudoAnd... that's a crash.
AFL Complications
We get a lovely error message:
Whoops, the target binary crashed suddenly, before receiving any input from the fuzzer!
There's further information available, telling us that the fork server crashed with signal 11. When we tried to run sudo on its own, we got a segmentation fault. Using gdb to further investigate this matter, we find that it crashes when calling the afl_setup_first() function. That's odd, since it's crashing on code that afl injected into sudo.

gdb. The segmentation fault happens in afl's own code!This is something that we need to look into. In the interest of video and article length, we'll end the first part of the series here. So much for a quick 20-minute, in-out project where we throw afl-fuzz at sudo and call it a day, right?
Final Words
The recently-uncovered and promptly-patched sudo vulnerability enabled users to gain unauthorized root privileges by typing in something like sudoedit -s 'AAAAAAAAAAA', which caused a malloc(): invalid size (unsorted) message to crop up in the terminal. Yikes!
To reproduce and investigate this vulnerability, we used a Docker container to setup the environment with all the necessary packages - including the pre-patch sudo utility. In a bid to fuzz sudo's arguments to find the vulnerability ourselves as if we had no idea of how it was uncovered, we modified afl-fuzz so that it could fuzz command line arguments instead of the program standard input. When we tried to run the fuzzing, we actually crashed the afl code before the modification for argument fuzzing even executed.
In the next episode in this series, we'll try to progress past this issue so that we can fuzz sudo and reproduce the vulnerability